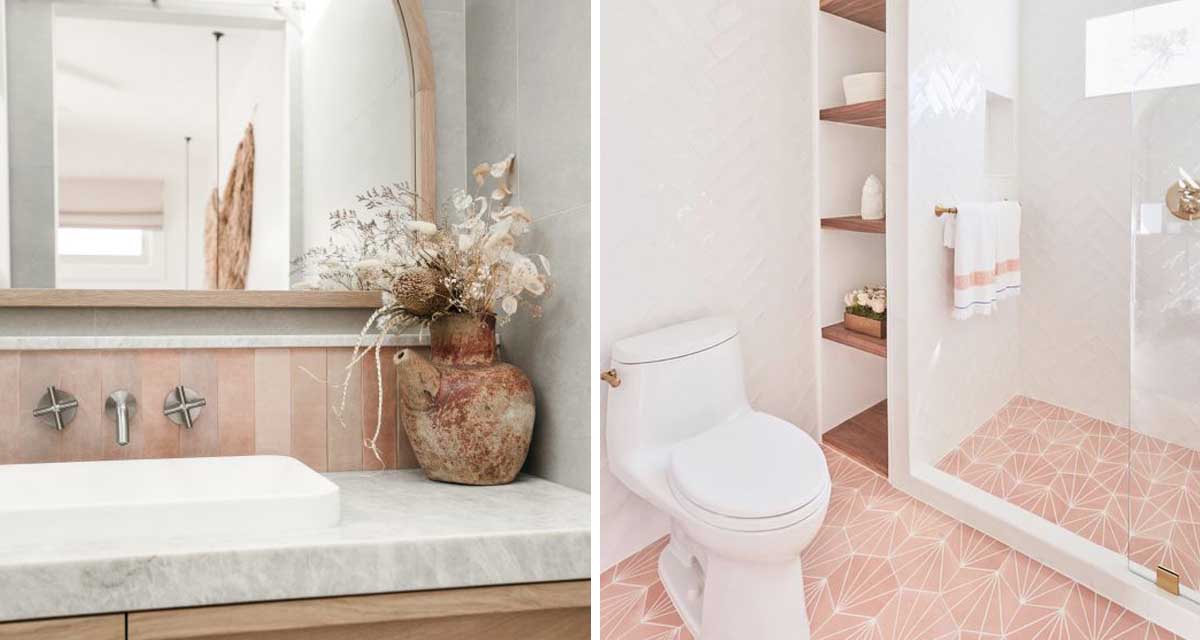
Here at The Home Studio we’re very excited that we’ve got another pink bathroom in the making. Remember our first pink bathroom and the main en-suite at House J? To suit our clients, we took a sophisticated and bold approach using a colour palette of grey, black and white with contrasting pink elements. This gave the bathroom lots of personality with a feminine flair.
At House G our bathroom recipients are my two lucky little girls, so the approach to space has been a little more simplistic and playful. Interestingly the first question I always get asked about the idea of creating a pink bathroom for them is, “Won’t they grow out of the space?!”. Honestly, no I don’t think. I mean, I am going to love the space as much as they are! And just because we’re using the colour pink, does not mean that the design is not sophisticated or timeless.


When considering how to bring the pink into the room, my first thought was to bring it in through the floor tiles in an all white space. Then I thought perhaps we’d keep it to the countertops and sink, and at one stage I was about to pull the trigger on a pink bathtub! Naturally The Client vetoed this in haste.
However these two inspiration images pretty much sum up my preferred approach to the space. Instead of a more peachy pink, I was after a bolder, bright pink. Then I chose to have all the colour coming in through the wall tiles. Using a tile with a texture and handcrafted look also makes the space feel more personal, with a lot less reference to the shiny pink bathrooms we know from the 80s.


To work alongside this look, using a floor tile that resembles natural stone, in a soft grey colour, also brings a softer edge to the room. The rest of the room is finished in all white, for a lovely fresh and modern contrast. The abundance of white is the perfect offset and contrast to the hot pink tiles.

BEFORE
If you think this is a standard bathroom renovation, think again. On this project we needed to turn a bedroom into a family bathroom and laundry space. Look below. This is the space before we took ownership of the house, with the previous owners belongings still in the room.

To turn a room without plumbing into a bathroom is no small feat and required some precision planning. This layout shows how we decided to separate the bedroom, putting the bathroom at the back of the room and the laundry space at the front. Proportions are tight, but we’ve managed to squeeze it all in.

All the flooring in the room had to be removed and we had to lay down waterproof boards and waterproofing before putting in the new tiled floors. We also had to put all the pipes and plumbing in the walls and floors. I have to be honest, the scariest part was seeing the status of the foundations of this old house, but luckily it’s still standing!
During construction we then found out that the side wall of the room was only single brick, so we had to create wall cavities to house the piping. We opted for a half wall to create a feature ledge running along the length of the one wall.
A new wall had to be built to separate the bathroom from the new laundry.


For a little extra privacy and to create a lovely feature in the room, we choose to remove the large window and instead install a much smaller porthole window. To compliment the round window, we arched the wall opening between the bathroom and laundry space.

Things started to take shape when our beautiful pink tiles arrived on site – much to the horror of our tiler. While it might seem like the installation of the pattern is completely random, it actually took a lot of tile sorting and pattern planning to get the installation look we were after. Dry running a tile installation is a renovation must!


So much progress and yet still so much to do. We can’t wait for the end result, which we’ll be able to photograph and show you early next year.


